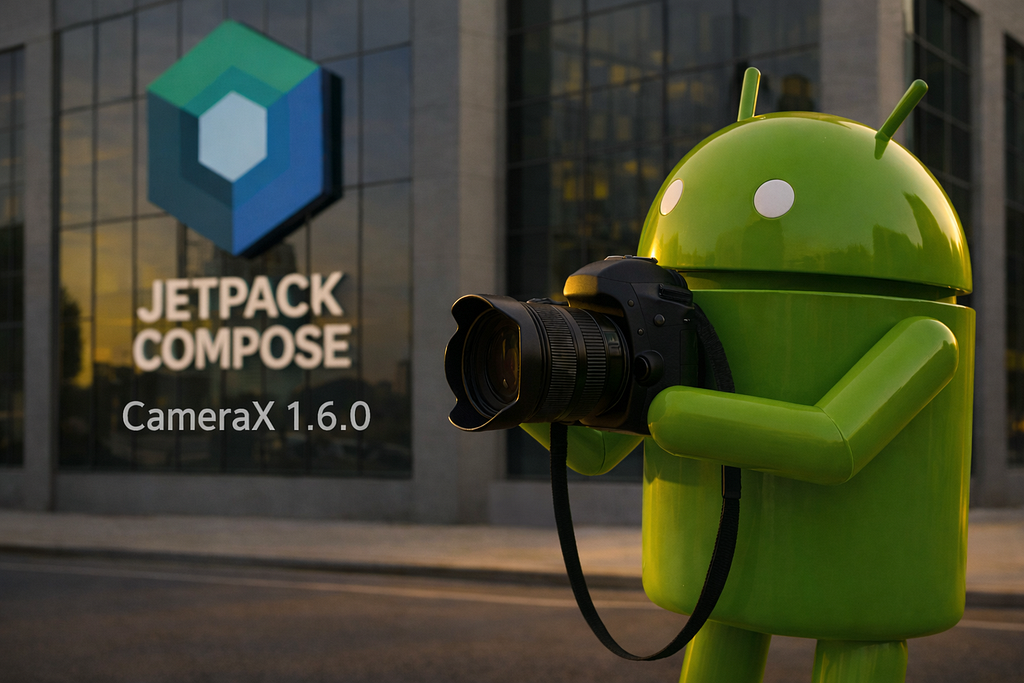

New Article for 2026 covering CameraX Compose Integration, the 1.5/1.6 Platform Features, and the Broader Ecosystem.
Introduction
If you’ve built a camera screen with Jetpack Compose, you’ve probably used this pattern:
AndroidView(PreviewView)
And for a basic preview, it worked. PreviewView is mature and battle-tested. It handles rotation, aspect ratios, surface lifecycle, and device fragmentation automatically. Many of us shipped production camera apps with exactly this approach.
But it was still a “View island” inside an otherwise declarative UI tree. In its default PERFORMANCE mode, PreviewView rendered through SurfaceView outside the rendering pipeline, so blur, alpha, graphicsLayer transforms, and Compose screenshots didn’t work. Switching to COMPATIBLE mode (TextureView) fixed the effects, but you were still managing a View lifecycle inside Compose’s recomposition system. Gesture mapping reached through previewView.meteringPointFactory, and scaling used PreviewView.ScaleType instead of ContentScale and Alignment.
With the CameraX 1.5/1.6 generation, those problems are meaningfully addressed. CameraXViewfinder consumes a SurfaceRequest directly in Compose (no AndroidView, no PreviewView) and adds reactive coordinate transforms, native scaling and alignment, resilient surface lifecycle management, and full graphics layer support in EMBEDDED mode, all within a single lifecycle system.
This isn’t “PreviewView but in Compose.” It’s a genuine evolution of the camera UI layer.
This guide is structured in three parts:
- Part 1: camera-compose — The Compose-native integration: what changed, why it matters, and hands-on code for preview, gestures, and capture.
- Part 2: CameraX 1.5/1.6 Platform Improvements — Core features like SessionConfig and Feature Groups that benefit both XML and Compose apps, plus the 1.6 maturity release.
- Part 3: The Broader CameraX Ecosystem — Pre-existing features (Media3, ML Kit, Extensions, physical lens selection) that work identically with both PreviewView and CameraXViewfinder.
IMPORTANT — Each part is self-contained:
If you only care for the Compose-native camera path, read just Part 1.
Parts 2 and 3 add platform evolution and ecosystem integrations for readers who want the full picture.
Companion Project
You will find a companion project on GitHub for this article that demonstrates the new Jetpack Compose inclusive features of CameraX.
Note on code snippets:
All code snippets in this article are simplified and stripped of details unrelated to the CameraX feature being discussed. Variable names, error handling, edge cases, and UI polish are condensed for clarity.
Each snippet includes a reference to the corresponding companion project file for the complete, runnable implementation.
Permission UX (quick note)
This article intentionally focuses on the Compose + CameraX parts. However, permissions are part of real camera apps, so here is the approach used in the companion project:
- Request CAMERA at the preview entry point.
- Request RECORD_AUDIO only when the user starts recording (mic on demand).
- A tiny PermissionGate composable handles grant/deny/re-request inside the Compose tree.
- To satisfy Lint around @RequiresPermission, the call sites also do an explicit checkSelfPermission(…) before invoking mic-dependent APIs.
This is not just “extra polish”. It makes the user experience better: the user is not forced to grant microphone permission if they only want photos. And from a developer perspective, it keeps permission decisions inside the Compose tree, close to the UI that needs them.
See the companion project for the full PermissionGate implementation.
How We Got Here: The Road to Compose-Native Camera
To appreciate where CameraXViewfinder fits, it helps to understand the journey in broad strokes. Each generation solved real limitations and created the foundation for the next.
Camera1 → Camera2: From Black Box to Pipeline (API 1 → API 21)
Camera1 (android.hardware.Camera) was opaque: string-based key-value configs and SurfaceView previews lacked pre-flight validation, causing runtime fragmentation crashes (e.g., Nexus vs. Samsung). Developers manually calculated sensor rotations, matched aspect ratios, and managed surface connections.
Android 5.0’s Camera2 introduced a HAL3 request-based pipeline. Submitting per-frame CaptureRequests (controlling exposure, ISO, focus, white balance) yields CaptureResult metadata and image buffers. This unlocks RAW, HDR, bursts, and concurrent streams. However, even a basic preview demands significant boilerplate (manager enumeration, characteristics queries, session state machines, async callbacks, and manual lifecycle sync), making it powerful but prone to leaks and device-specific bugs.
The CameraX Era (2019 →)
Google’s CameraX (a Jetpack library over Camera2) translates high-level commands into safe Camera2 calls, transparently applying vendor fixes via an automated test lab covering 98%+ of active Android devices.
Developers bind Use Cases (Preview, ImageCapture, VideoCapture, ImageAnalysis) to a LifecycleOwner for automatic resource management.
Key building blocks that emerged over successive releases:
- PreviewView: Automatically handles display rotation, scaling, and aspect ratio matching.
- LifecycleCameraController: A convenience wrapper that bundles camera binding, tap-to-focus, and pinch-to-zoom into a single class. Assign it to a PreviewView, bind to a LifecycleOwner, and you have a working camera in ~10 lines. (LegacyControllerPreview.kt). The trade-off is that it is tied to PreviewView. There is no equivalent convenience controller for CameraXViewfinder, so the Compose-native path uses standard gesture APIs (detectTapGestures, detectTransformGestures), with MutableCoordinateTransformer handling tap-to-focus coordinate mapping.
- ProcessCameraProvider: The lower-level provider that gives you direct control over use-case binding. More verbose than LifecycleCameraController, but also more flexible. You choose exactly which use cases to bind and how to handle gestures yourself. This is also the shared lower-level path used by both PreviewView and CameraXViewfinder, making it the natural starting point if you plan to migrate to Compose. (LegacyTapToFocusPreview.kt)
- Camera Extensions API: Unlocks OEM hardware features (Bokeh, Night, HDR) in two lines via ExtensionsManager.
Ultimately, CameraX cures rotation, aspect ratio, and fragmentation headaches for the vast majority of apps.
The Current Era — ‘camera-compose’
As Compose became the standard declarative UI toolkit, the AndroidView(PreviewView) interop left the camera preview as the lone legacy View component in modern app trees.
The camera-compose library isn’t just a Compose wrapper around PreviewView. It is a genuine evolution of the UI integration layer. It entirely eliminates the friction of the old interop approach by solving:
- Rendering limitations: Eliminates the View-inside-Compose lifecycle mismatch. (PreviewView’s COMPATIBLE mode could enable effects, but at the cost of managing two lifecycle systems.)
- Coordinate bridging friction: Streamlines mapping between the camera sensor and UI.
- Legacy scaling APIs: Replaces PreviewView.ScaleType with native ContentScale and Alignment.
- Lifecycle fragility: Stabilizes surface lifecycle management.
We’ll explore exactly what changed under the hood in the next section.
Where Each Layer Lives in the Stack
The Misconception: Camera2 is the “old way” and CameraX is the “new way.”
The Reality: They are interconnected layers of the exact same system, running simultaneously.
┌─────────────────────────────────────┐
│  UI Layer (Compose or XML Views)    │ ← CameraXViewfinder or PreviewView
├─────────────────────────────────────┤
│  CameraX (camera-core, lifecycle)   │ ← High-level abstraction
├─────────────────────────────────────┤
│  camera-camera2 artifact            │ ← Bridge between CameraX and Camera2
├─────────────────────────────────────┤
│  Camera2 Framework                  │ ← The underlying engine (always running)
└─────────────────────────────────────┘
Because this underlying engine remains the same across both toolkits, these three architectural truths apply:
- Shared Core Knowledge: High-level classes like CameraSelector, ImageCapture, and ImageAnalysis are 100% reusable across Views and Compose. Only the UI integration layer changes.
- Unified Bug Fixes: When Google patches a device-specific hardware bug, both UI approaches benefit immediately because they rely on the same CameraX core.
- Identical Hardware Access: Both UIs have identical camera capabilities. However, CameraXViewfinder provides a cleaner integration: the preview is a native composable (no View lifecycle to manage), surface lifecycles are resilient across configuration changes, and Compose’s native ContentScale and Alignment replace legacy ScaleType.
Part 1: camera-compose — The Compose-Native Integration
This section is centered on the camera-compose artifact and the Compose-native camera experience. What changed, hands-on code, migration guidance, and practical reference material.
1.1 What Actually Changed?
CameraXViewfinder is not a View wrapped inside a composable. It inherits all of PreviewView’s strengths (rotation, aspect ratios, surface lifecycle, fragmentation handling), and adds what interop couldn’t:
a. Compose-Native Coordinate Transformer
In the PreviewView era, translating a tap into a focus target usually started with PreviewView.meteringPointFactory (the Kotlin property for Java’s getMeteringPointFactory()), which bundled coordinate mapping and metering-point creation.
The Compose equivalent, MutableCoordinateTransformer, achieves the exact same concept but lives entirely within the composable scope alongside your gesture handlers, eliminating the need to reference imperative View objects from declarative code. Unlike the old static factory tied to a specific PreviewView state, this new transformer is inherently reactive. It continuously monitors the composable’s state, dynamically adjusting for device rotation, layout aspect ratio changes, letterboxing, and applied scaling modes.
This transformation is also bidirectional: the ImageInfo class provides getSensorToBufferTransformMatrix(), allowing you to map bounding boxes from machine learning models (like ML Kit’s MlKitAnalyzer using COORDINATE_SYSTEM_ORIGINAL) back onto the UI overlay with accurate alignment.
b. Full Composable Rendering
By default, PreviewView operates in PERFORMANCE mode, which typically uses a SurfaceView that renders on a separate hardware layer outside the Compose scene graph.
While basic Modifier.clip() worked by clipping the AndroidView wrapper, deeper visual adjustments (blur, alpha, graphicsLayer transforms, RenderEffect, Compose screenshots) failed in the default PERFORMANCE mode because SurfaceView pixels lived on an isolated hardware layer outside the rendering pipeline. Switching PreviewView to COMPATIBLE mode (TextureView) fixed the effects, but you were still managing a View lifecycle inside Compose, two systems, not one. That is, the AndroidView interop path requires you to manually create the PreviewView instance with remember, wire its surfaceProvider inside a DisposableEffect, handle cleanup in onDispose, and use key() to force teardown and recreation when the implementation mode changes (LegacyEffectsPreview.kt). That is View lifecycle management living inside your Compose tree.
CameraXViewfinder in EMBEDDED mode achieves the same effect support without that interop baggage. There is no AndroidView, no DisposableEffect for cleanup, no key() for teardown. Just a LaunchedEffect for camera binding and a composable that consumes a SurfaceRequest via StateFlow. Standard modifiers work as expected, overlays stack naturally, and the implementation mode is simply a parameter you pass (EffectsPreview.kt). One system, idiomatic Compose.
c. Native ContentScale and Alignment
Previously, scaling a camera preview relied on legacy PreviewView.ScaleType enumerations. CameraXViewfinder abandons these in favor of native ContentScale and Alignment APIs, identical to those used by a standard Image composable. You can apply ContentScale.Crop to fill the container while preserving the aspect ratio, or use ContentScale.Fit to display the entire frame with letterboxing. Pairing these with Alignment.TopCenter ensures a subject’s head isn’t truncated during a crop. Ultimately, this makes the camera preview behave exactly like every other visual composable in your layout. The difference in code is telling, as PreviewView tightly coupled scaling and alignment into a single enum:
// LEGACY: PreviewView — 6 options, scaling and alignment fused together
AndroidView(
    factory = { previewView },
    update = { view -> view.scaleType = PreviewView.ScaleType.FIT_CENTER },
    modifier = Modifier.fillMaxSize()
)
Companion project → legacy/LegacyContentScalePreview.kt
With CameraXViewfinder, they’re independent — just like Image():
// NEW: CameraXViewfinder — ContentScale × Alignment = 63 combinations
CameraXViewfinder(
    surfaceRequest = request,
    contentScale = ContentScale.Fit,       // 7 options: Crop, Fit, FillBounds, etc.
    alignment = Alignment.TopCenter,       // 9 options: Center, TopStart, BottomEnd, etc.
    modifier = Modifier.fillMaxSize()
)
Companion project → simplistic/ContentScalePreview.kt
Six fused options versus sixty-three independent combinations, and the API matches every other visual composable in your app.
d. Unidirectional Data Flow
The mental model has evolved:
- PreviewView model: “Give CameraX a View’s SurfaceProvider.” The View owns the surface, and CameraX writes to it.
- Compose model: “CameraX publishes SurfaceRequests, and Compose consumes them.” CameraX produces, Compose renders.
This unidirectional flow is idiomatic to Compose. It makes the code more testable, easier to reason about, and more resilient to configuration changes like device folding or resizing.
e. Resilient Surface Lifecycle
With AndroidView(PreviewView), you managed a View lifecycle inside Compose’s recomposition system. It worked, but it was extra machinery, and it was fragile during configuration changes.
CameraXViewfinder improves this: on API 29+, the internal ViewfinderSurfaceSession reuses the surface buffer across configuration changes (rotation, folding, resizing) rather than destroying and reallocating it every time. This happens automatically. Every screen that uses CameraXViewfinder benefits without any extra code.
Note that a brief black frame is still expected during full activity recreation (e.g. rotation) because the Compose tree rebuilds and the camera pipeline rebinds. The improvement is under the hood: less allocation overhead and faster surface recovery compared to the PreviewView interop approach.
One lifecycle system, not two. And your UI state survives configuration changes through standard Compose patterns like rememberSaveable.
f. Two Implementation Modes
PreviewView let you choose between two rendering backends:
- PERFORMANCE (SurfaceView — best latency, fewer composition tricks)
- COMPATIBLE (TextureView — works with View animations and transforms).
CameraXViewfinder carries the same concept forward but renames the modes to reflect what they mean in a Compose context:
- EXTERNAL — SurfaceView-backed. The surface lives outside the Compose scene graph. Best performance and lowest latency, but Compose graphics-layer effects (blur, alpha, RenderEffect) are silently ignored.
- EMBEDDED — TextureView-backed. The surface is embedded within the Compose scene graph as a regular composable. Full support for graphicsLayer transforms, RenderEffect, overlays, and Compose screenshots — at a slight performance cost.
If you don’t specify a mode, the library prefers EXTERNAL for performance and falls back to EMBEDDED when needed. We explore the trade-offs and usage in detail in section 1.6.
1.2 AndroidView Interop vs. CameraXViewfinder
Now that we have covered the core concepts, let’s look at a side-by-side comparison of how the legacy PreviewView interop stacks up against the native, truly declarative, unidirectional approach using CameraXViewfinder across these key areas:
https://medium.com/media/6391164405983d13b13bfec0bc18e528/href
1.3 Show Me the Code
1.3.1 Let’s start simple: a working camera preview.
A small detail that helps a lot is a fixed state pattern: we separate the writer state (MutableStateFlow, updated by CameraX callbacks) from the reader state (collectAsStateWithLifecycle, consumed by Compose).
That way, CameraX can publish updates and Compose can react, without mixing responsibilities.
@Composable
fun CameraPreview(modifier: Modifier = Modifier) {
    val context = LocalContext.current
    val lifecycleOwner = LocalLifecycleOwner.current

    // Writer/Reader state separation
    val surfaceRequests = remember { MutableStateFlow<SurfaceRequest?>(null) }
    val surfaceRequest by surfaceRequests.collectAsStateWithLifecycle()

    LaunchedEffect(Unit) {
        val provider = ProcessCameraProvider.awaitInstance(context)
        val preview = Preview.Builder().build().apply {
            setSurfaceProvider { request -> surfaceRequests.value = request }
        }
        provider.unbindAll()
        provider.bindToLifecycle(lifecycleOwner, CameraSelector.DEFAULT_BACK_CAMERA, preview)
    }

    surfaceRequest?.let { request ->
        CameraXViewfinder(surfaceRequest = request, modifier = modifier.fillMaxSize())
    }
}
Companion project → simplistic/BasicCameraPreview.kt, line 35
There is no AndroidView. No PreviewView. No hidden view hierarchy. One direction, one pipeline.
1.3.2 Optional: Preview with a lens-switch FAB (front/back)
This is a very practical next step because it also shows that rebinding can be driven by Compose state:
@Composable
fun PreviewWithLensSwitch(modifier: Modifier = Modifier) {
    // ... same surfaceRequests / surfaceRequest pattern as above ...

    var useFront by rememberSaveable { mutableStateOf(false) }
    val selector = if (useFront) CameraSelector.DEFAULT_FRONT_CAMERA
                   else CameraSelector.DEFAULT_BACK_CAMERA

    // Rebinds automatically when selector changes
    LaunchedEffect(selector) {
        val provider = ProcessCameraProvider.awaitInstance(context)
        val preview = Preview.Builder().build().apply {
            setSurfaceProvider { req -> surfaceRequests.value = req }
        }
        provider.unbindAll()
        provider.bindToLifecycle(lifecycleOwner, selector, preview)
    }

    Box(Modifier.fillMaxSize()) {
        surfaceRequest?.let { req ->
            CameraXViewfinder(surfaceRequest = req, modifier = Modifier.fillMaxSize())
        }
        FloatingActionButton(onClick = { useFront = !useFront }, /* ... */) {
            Icon(Icons.Rounded.Cameraswitch, contentDescription = "Switch camera")
        }
    }
}
Companion project → simplistic/CameraSwitchingPreview.kt, line 45
1.3.3 The Real Test: Interactive Camera Controls
This is where the Compose-native integration really shines.
Preview-only screens are straightforward in both approaches. The real benefit shows up with interaction: focus, metering, overlays — all handled with Compose gesture APIs and the coordinate transformer, with no View references in sight.
To see the difference, here’s what tap-to-focus looked like with the AndroidView(PreviewView) approach:
// OLD: Compose gesture → reach back into View for the metering factory
AndroidView(factory = { previewView }, modifier = Modifier.fillMaxSize()
    .pointerInput(Unit) {
        detectTapGestures { offset ->
            val point = previewView.meteringPointFactory  // ← interop boundary
                .createPoint(offset.x, offset.y)
            camera.cameraControl.startFocusAndMetering(
                FocusMeteringAction.Builder(point).build()
            )
        }
    }
)
Conceptual illustration of the interop boundary. The companion project’s legacy/LegacyTapToFocusPreview.kt uses PreviewView.setOnTouchListener with ScaleGestureDetector instead — pure View-side touch handling.
This works: previewView.meteringPointFactory handles the coordinate translation correctly.
The Compose-native version does the same thing, but everything stays in composable scope:
@Composable
fun InteractiveCameraPreview(modifier: Modifier = Modifier) {
    // ... same provider/preview binding as CameraPreview, but also capture the Camera reference ...
    var camera by remember { mutableStateOf<Camera?>(null) }

    // The key addition: a reactive coordinate transformer
    val coordinateTransformer = remember { MutableCoordinateTransformer() }

    surfaceRequest?.let { request ->
        CameraXViewfinder(
            surfaceRequest = request,
            coordinateTransformer = coordinateTransformer,
            modifier = modifier.fillMaxSize()
                .pointerInput(camera) {
                    // Tap-to-focus
                    detectTapGestures { offset ->
                        val cam = camera ?: return@detectTapGestures
                        val surfacePoint = with(coordinateTransformer) { offset.transform() }
                        val focusPoint = SurfaceOrientedMeteringPointFactory(
                            request.resolution.width.toFloat(),
                            request.resolution.height.toFloat()
                        ).createPoint(surfacePoint.x, surfacePoint.y)
                        cam.cameraControl.startFocusAndMetering(
                            FocusMeteringAction.Builder(focusPoint, FLAG_AF or FLAG_AE)
                                .setAutoCancelDuration(3, TimeUnit.SECONDS).build()
                        )
                    }
                }
                .pointerInput(camera) {
                    // Pinch-to-zoom
                    detectTransformGestures { _, _, zoom, _ ->
                        val cam = camera ?: return@detectTransformGestures
                        val zoomState = cam.cameraInfo.zoomState.value ?: return@detectTransformGestures
                        cam.cameraControl.setZoomRatio(
                            (zoomState.zoomRatio * zoom).coerceIn(zoomState.minZoomRatio, zoomState.maxZoomRatio)
                        )
                    }
                }
        )
    }
}
Companion project → simplistic/TapToFocusPreview.kt, line 56
Compared to the AndroidView approach, the Compose-native version:
- Keeps the coordinate transformer in the same composable scope as the gesture handler
- Uses MutableCoordinateTransformer instead of previewView.meteringPointFactory
- Renders the preview inside Compose’s scene graph — standard modifiers work on it
- Manages everything through Compose’s lifecycle (remember, LaunchedEffect)
The steps are the same as before:
- Tap in Compose coordinates.
- Transform to camera surface coordinates (now via MutableCoordinateTransformer).
- Build metering point.
- Start focus/metering.
Same logic, fully Compose-native.
1.3.4 Capturing Photos and Video
Once you understand the preview pipeline, capture is not a separate world. You just bind more use cases, then trigger them from Compose UI.
This also fits nicely with the permission story: request camera permission at entry, and request microphone permission only when starting a recording (mic on demand). The PermissionGate approach keeps that logic inside your Compose tree, close to the UI that needs it.
@Composable
fun CameraScreen() {
    // ... same surfaceRequests pattern ...
    var imageCapture by remember { mutableStateOf<ImageCapture?>(null) }
    var videoCapture by remember { mutableStateOf<VideoCapture<Recorder>?>(null) }

    // Bind all three use cases together
    LaunchedEffect(Unit) {
        val provider = ProcessCameraProvider.awaitInstance(context)
        val preview = Preview.Builder().build().apply {
            setSurfaceProvider { req -> surfaceRequests.value = req }
        }
        imageCapture = ImageCapture.Builder()
            .setCaptureMode(ImageCapture.CAPTURE_MODE_MINIMIZE_LATENCY).build()
        videoCapture = VideoCapture.withOutput(
            Recorder.Builder().setQualitySelector(QualitySelector.from(Quality.FHD)).build()
        )
        provider.bindToLifecycle(
            lifecycleOwner, CameraSelector.DEFAULT_BACK_CAMERA,
            preview, imageCapture!!, videoCapture!!
        )
    }

    Box(modifier = Modifier.fillMaxSize()) {
        surfaceRequest?.let { request ->
            CameraXViewfinder(surfaceRequest = request, modifier = Modifier.fillMaxSize())
        }
        // Photo + Video buttons in the same Compose tree as the preview
        Row(Modifier.align(Alignment.BottomCenter).padding(bottom = 32.dp)) {
            IconButton(onClick = { capturePhoto(context, imageCapture) }) { /* ... */ }
            IconButton(onClick = { toggleRecording(context, videoCapture, activeRecording) }) { /* ... */ }
        }
    }
}

// capturePhoto() saves to MediaStore via ImageCapture.takePicture()
// toggleRecording() starts/stops via VideoCapture.output.prepareRecording()
// See companion project for full implementations
Companion project → simplistic/PhotoVideoCapturePreview.kt, line 61
The important point is not only “you can capture photos and video”.
The important point is: “your preview and your controls live in the same Compose tree”.
With CameraXViewfinder, the preview is no longer a View layer sitting alongside a Compose layer. It’s all one UI system. Your capture button, your recording indicator, your overlays — they all live in the same Compose scene graph as the preview, which means standard modifiers, animations, and layout tools apply to everything uniformly.
1.4 Migration Strategy: PreviewView → CameraXViewfinder
If you already have camera code using PreviewView, don’t worry. The migration is conceptually simple.
Before (AndroidView approach):
@Composable
fun OldCameraPreview() {
    val previewView = remember { PreviewView(context) }

    DisposableEffect(previewView) {
        val cameraProviderFuture = ProcessCameraProvider.getInstance(context)
        cameraProviderFuture.addListener({
            val provider = cameraProviderFuture.get()
            val preview = Preview.Builder().build()
            preview.surfaceProvider = previewView.surfaceProvider   // ← View owns the surface
            provider.bindToLifecycle(lifecycleOwner, CameraSelector.DEFAULT_BACK_CAMERA, preview)
        }, ContextCompat.getMainExecutor(context))
        onDispose { /* unbind */ }
    }

    AndroidView(factory = { previewView }, modifier = Modifier.fillMaxSize())
}
Illustrative migration example. The companion project’s legacy/LegacyBasicPreview.kt uses LaunchedEffect rather than DisposableEffect — the pattern shown here is a common legacy variant.
After (the Compose-native way):
@Composable
fun NewCameraPreview() {
    val surfaceRequests = remember { MutableStateFlow<SurfaceRequest?>(null) }
    val surfaceRequest by surfaceRequests.collectAsStateWithLifecycle()

    LaunchedEffect(Unit) {
        val provider = ProcessCameraProvider.awaitInstance(context)
        val preview = Preview.Builder().build().apply {
            setSurfaceProvider { req -> surfaceRequests.value = req }  // ← CameraX publishes
        }
        provider.bindToLifecycle(lifecycleOwner, CameraSelector.DEFAULT_BACK_CAMERA, preview)
    }

    surfaceRequest?.let {
        CameraXViewfinder(surfaceRequest = it, modifier = Modifier.fillMaxSize())  // ← Compose consumes
    }
}
Companion project → simplistic/BasicCameraPreview.kt, line 35
The mindset shift is the key:
- AndroidView model: “Give CameraX a View’s SurfaceProvider.”
- Compose model: “Let CameraX publish SurfaceRequests, and let Compose render them.”
This is not just a different API. It’s a cleaner separation of responsibilities that matches the way Compose apps are usually built — and it eliminates the rendering limitations, lifecycle fragility, and coordinate bridging that came with the interop approach.
1.5 Dependencies You Need
These are the relevant camera and integration dependencies from the companion app for a modern Compose-native CameraX project (intentionally excluding the legacy camera-view dependency and app-specific libraries like navigation and DI).
Add to your libs.versions.toml:
[versions]camerax = "1.6.0-rc01"
media3 = "1.9.2"
windowManager = "1.5.1"

[libraries]# Adaptive Layout using WindowSizeClass
androidx-compose-material3-windowsizeclass = { group = "androidx.compose.material3", name = "material3-window-size-class" }

# Foldable / Adaptive Window Info (WindowInfoTracker, FoldingFeature)
androidx-window = { module = "androidx.window:window", version.ref = "windowManager" }

# CameraX Libraries :)
# The New Compose Library
androidx-camera-compose = { module = "androidx.camera:camera-compose", version.ref = "camerax" }

# The Standard Camera Libraries
androidx-camera-camera2 = { module = "androidx.camera:camera-camera2", version.ref = "camerax" }
androidx-camera-core = { module = "androidx.camera:camera-core", version.ref = "camerax" }
androidx-camera-video = { module = "androidx.camera:camera-video", version.ref = "camerax" }
androidx-camera-lifecycle = { module = "androidx.camera:camera-lifecycle", version.ref = "camerax" }

# CameraX Extensions (Night, HDR, Bokeh, Face Retouch, Auto)
androidx-camera-extensions = { module = "androidx.camera:camera-extensions", version.ref = "camerax" }

# ML Kit integration helper (MlKitAnalyzer convenience wrapper)
androidx-camera-mlkit-vision = { module = "androidx.camera:camera-mlkit-vision", version.ref = "camerax" }

# Media3 (video editing + playback)
media3-exoplayer = { module = "androidx.media3:media3-exoplayer", version.ref = "media3" }
media3-transformer = { module = "androidx.media3:media3-transformer", version.ref = "media3" }
media3-effect = { module = "androidx.media3:media3-effect", version.ref = "media3" }
media3-ui-compose = { module = "androidx.media3:media3-ui-compose", version.ref = "media3" }
Add to your app module’s build.gradle.kts:
dependencies {
  // CAMERA-X
  implementation(libs.androidx.camera.core)
  implementation(libs.androidx.camera.camera2)
  implementation(libs.androidx.camera.lifecycle)
  implementation(libs.androidx.camera.video)

  // The new Compose-native viewfinder
  implementation(libs.androidx.camera.compose)

  // CameraX Extensions (Night, HDR, Bokeh, Face Retouch, Auto)
  implementation(libs.androidx.camera.extensions)

  // ML Kit integration helper (MlKitAnalyzer)
  implementation(libs.androidx.camera.mlkit.vision)
  // + one or more ML Kit detector dependencies (e.g. face-detection, barcode-scanning)

  // Media3 (video editing + playback)
  implementation(libs.media3.exoplayer)
  implementation(libs.media3.transformer)
  implementation(libs.media3.effect)
  implementation(libs.media3.ui.compose)

  // Foldable / adaptive window info
  implementation(libs.androidx.compose.material3.windowsizeclass)
  implementation(libs.androidx.window)
}
Companion project → gradle/libs.versions.toml and app/build.gradle.kts
Why camera-camera2? CameraX is a high-level abstraction built on top of the Camera2 framework. The camera-camera2 artifact is the bridge that lets CameraX talk to the actual camera hardware. Without it, CameraX can’t function. It also enables Camera2CameraInfo for physical lens enumeration — reading camera IDs, focal lengths, and facing to discover and target individual cameras beyond the logical DEFAULT_BACK_CAMERA. (See the “Where Each Layer Lives in the Stack” diagram earlier.)
Why camera-mlkit-vision? This is the bridge between CameraX’s ImageAnalysis pipeline and ML Kit’s detectors. It provides MlKitAnalyzer — an ImageAnalysis.Analyzer implementation that handles ImageProxy → InputImage conversion, proxy lifecycle management, multi-detector execution, and coordinate system configuration. Without it, you need to write this plumbing yourself for every detector. If your app doesn’t use ML Kit, you can omit this dependency entirely.
Why camera-extensions? This gives your app access to OEM hardware-backed processing modes — Night, HDR, Bokeh, Face Retouch, and Auto — via ExtensionsManager. Availability is device-dependent (not every device supports every mode), so the API includes availability checks before enabling. If your app doesn’t need these processing modes, you can omit this dependency entirely.
Why androidx.window? This provides WindowInfoTracker and FoldingFeature — the APIs that detect hinge position and fold state on foldable devices. Combined with WindowSizeClass, it lets your camera layout respond to both screen width and physical form factor. If your app doesn’t target foldables, you can omit this dependency and use WindowSizeClass alone.
Why four Media3 artifacts? media3-exoplayer is the playback engine. media3-transformer handles video editing (trimming, effects, transcoding). media3-effect provides built-in video effects like Presentation (resize/crop) — Transformer depends on it for applying effects. media3-ui-compose provides PlayerSurface, the Compose-native player surface. We use media3-ui-compose (not media3-ui) because PlayerSurface is a true composable — no AndroidView(PlayerView) wrapping needed. If your app doesn’t need video editing or playback, you can omit all four.
Manifest permissions:
<uses-permission android:name="android.permission.CAMERA" />
<uses-permission android:name="android.permission.RECORD_AUDIO" />
Companion project → app/src/main/AndroidManifest.xml
1.6 Implementation Modes (Performance vs. Composition)
CameraXViewfinder can render the preview in two ways. This matters because it determines which Compose effects work on the preview.
1.6.1 EXTERNAL (SurfaceView-backed)
Camera frames render on a separate hardware surface, composited by the system independently from your Compose draw pass. This gives the best performance and lowest latency — the camera frames bypass your app’s GPU pipeline entirely.
The tradeoff: because the preview isn’t part of Compose’s scene graph, per-pixel effects (blur, alpha, rotation, RenderEffect) don’t apply to the preview, and Compose screenshots won’t capture it.
- Pros: lowest latency, less GPU work, great for full-screen preview and recording
- Cons: graphics layer effects don’t apply; preview won’t appear in Compose screenshots
1.6.2 EMBEDDED (TextureView-backed)
Camera frames are drawn as a GPU texture inside your Compose render pass. The preview behaves like a normal composable — clipping, alpha, blur, transforms, and complex z-ordering all work naturally.
An important detail: this does NOT mean Compose recomposes on every frame. Camera frames do not change Compose state, so they don’t trigger recomposition. The texture updates within the existing scene.
- Pros: full composable behavior — clips, alpha, blur, shapes, z-order all work
- Cons: more GPU work in the same pipeline → slightly higher latency on mid-range devices
https://medium.com/media/cc09d17c1bb1e5ec551dc0a5ba2fa4ce/href
Rule of thumb: Full-screen/performant → EXTERNAL. Fancy composition/effects → EMBEDDED. If you don’t specify a mode, the library prefers EXTERNAL for performance, but may automatically fall back to EMBEDDED on legacy cameras, API 24-and-below devices, or devices with known compatibility quirks.
1.6.3 Surface Lifecycle Resilience
Regardless of mode, CameraXViewfinder handles configuration changes (rotation, folding, resizing) more gracefully than PreviewView. On API 29+, the underlying ViewfinderSurfaceSession can reuse the surface buffer across these transitions, reducing allocation churn and improving recovery time.
To force a mode:
import androidx.camera.viewfinder.core.ImplementationMode

CameraXViewfinder(
    surfaceRequest = request,
    implementationMode = ImplementationMode.EXTERNAL // or ImplementationMode.EMBEDDED
)
API usage example — the companion project uses the default mode
1.7 Real-World Gotchas
Coordinate transforms are not optional
This is the same principle as in the PreviewView era, where you’d use previewView.meteringPointFactory instead of passing raw view coordinates. The new equivalent is MutableCoordinateTransformer. Don’t skip it.
Multiple visual transformations are continuously applied between the raw sensor output and what the user sees: scaling to match aspect ratio, rotation adjustments for sensor orientation versus display state, and cropping from the applied scale mode. If you pass the raw tap Offset from Compose directly to SurfaceOrientedMeteringPointFactory, you’ll get incorrect focus points — it can look correct on one device in portrait and be noticeably off in landscape, on foldables, or with unusual aspect ratios. Always use the coordinate transformer.
The Front-Camera is mirrored
The selfie preview usually behaves like a mirror: when you raise your right hand, you see it on the right side of the screen. That feels natural to users. But the actual photo/video file is typically saved “non-mirrored” (what other people would see). This matters when you draw overlays on the preview (face boxes, AR markers, cropping guides) — if you place them based on preview coordinates and later use them for processing, they can end up flipped.
Test on real devices
Camera pipelines are one of the most OEM-dependent parts of Android. Even with CameraX, manufacturers have different sensors, drivers, and tuning. Test the risky parts: focus accuracy, zoom limits, switching cameras, device rotation, background/foreground transitions, and recording stability. A few representative devices can save you from bugs that only appear after release.
Permission UX
Ask for CAMERA permission when the user enters the camera screen. But don’t ask for RECORD_AUDIO unless the user actually starts recording video with sound. Many users want photos only, and asking for microphone permission too early feels suspicious and increases denial rates. The inline PermissionGate pattern keeps that logic inside your Compose tree.
1.8 Advanced: Foldables and Adaptive UIs
One nice side effect of “preview is a composable” is that adaptive layouts become natural. But “adaptive” means more than just wide-vs-narrow. On foldable devices, the hinge position and fold state directly affect where you should place the preview and controls — and WindowInfoTracker from the Jetpack WindowManager library gives you that information.
The Two Signals
There are two complementary signals for adaptive camera layouts:
- WindowSizeClass (Material 3) — width-based breakpoints (Compact, Medium, Expanded). Great for tablets, landscape, and fully-opened foldables. But it doesn’t know about hinges.
- WindowInfoTracker (androidx.window) — reports FoldingFeature events: hinge orientation (horizontal/vertical), fold state (FLAT, HALF_OPENED), and hinge bounds. This is what distinguishes a foldable in tabletop mode from a regular wide screen.
The strategy used in the companion project: check for a HALF_OPENED fold first (real foldable, mid-fold), then fall back to WindowSizeClass for everything else. For production apps, you may also want to account for FoldingFeature.isSeparating() and occlusion details, depending on how precisely you want to avoid the hinge area.
Detecting Posture
sealed interface DevicePosture {
    data object FullScreen : DevicePosture               // compact phone
    data object TwoPane : DevicePosture                  // tablet / landscape
    data class TableTop(val hingePosition: Int) : DevicePosture  // horizontal hinge
    data class Book(val hingePosition: Int) : DevicePosture      // vertical hinge
}

// rememberDevicePosture() collects WindowInfoTracker.windowLayoutInfo() as a Flow,
// checks for HALF_OPENED fold first, then falls back to WindowSizeClass.
// See companion project for full implementation.
Companion project → realistic/AdaptiveScreen.kt, line 44
Adapting the Camera Layout
With posture detected, CameraXViewfinder moves around like any other composable:
when (posture) {
    is DevicePosture.TableTop -> Column { CameraXViewfinder(/*...*/); CameraControls() }
    is DevicePosture.Book     -> Row    { CameraXViewfinder(/*...*/); CameraControls() }
    is DevicePosture.TwoPane  -> Row    { CameraXViewfinder(/*...*/); CameraControls() }
    is DevicePosture.FullScreen -> Box  { CameraXViewfinder(/*...*/); CameraControls() }
}
Companion project → simplistic/AdaptivePreview.kt, line 73
The key difference from a simple width check: TableTop mode uses a Column (top/bottom split) instead of a Row. When a user half-folds a Pixel Fold or Galaxy Z Fold and sets it on a table, the preview sits above the hinge and controls sit below it — matching the physical form factor. A width-only check would never produce that layout.
Dependency: This requires androidx.window:window:1.5.1 alongside material3-window-size-class. The companion project includes both.
Beyond posture-aware layouts:
This section focuses on hinge-aware layout switching, but foldable-first camera UX goes further. Some devices support rear-display mode (using the cover screen as a viewfinder for high-quality selfies with the main camera) and dual-screen mode (showing a subject preview on the outer display while the photographer uses the inner screen).
General multi-form-factor correctness — handling resize, rotation, and aspect-ratio changes gracefully across tablets, desktop windows, and connected displays — also matters.
For the full picture, see Support camera on multiple form factors in the official Android documentation.
Part 2: CameraX 1.5/1.6 — Platform-Wide Improvements
This section focuses on CameraX 1.5 and 1.6 highlights and related core capabilities that benefit both XML and Compose users — they work identically regardless of how you display the preview.
2.1 CameraX 1.5: Platform-Wide Improvements
For the full deep dive, see the official CameraX 1.5 announcement. Here are the highlights.
2.1.1 SessionConfig: Simplified Pipeline Management
The new SessionConfig API is arguably the biggest quality-of-life improvement. It centralizes use case binding and eliminates manual unbindAll() / rebind cycles when switching configurations — you just pass a new SessionConfig and CameraX handles the transition:
cameraProvider.bindToLifecycle(
    lifecycleOwner,
    cameraSelector,
    SessionConfig(
        useCases = listOf(preview, videoCapture),
        preferredFeatureGroup = listOf(HDR_HLG10, FPS_60, PREVIEW_STABILIZATION)
    )
)
CameraX 1.5 API — see the companion project’s SessionConfigPreview.kt demo and the official announcement for details
SessionConfig also powers the Feature Group API: instead of guessing whether a device supports HDR + 60fps together, you query it directly (in 1.5, this was introduced as cameraInfo.isFeatureGroupSupported()). Use requiredFeatureGroup for hard requirements (throws if unsupported) or preferredFeatureGroup for best-effort fallback. CameraX enables the highest-priority combination the hardware supports.
2.1.2 Other Key Additions
- High-speed/slow-motion video: Query Recorder.getHighSpeedVideoCapabilities(), configure frame rate ranges (120/240fps) via HighSpeedVideoSessionConfig, and set setSlowMotionEnabled(true) for automatic slow-motion playback encoding
- RAW/DNG capture: OUTPUT_FORMAT_RAW for standard Adobe DNG, or OUTPUT_FORMAT_RAW_JPEG for simultaneous RAW + JPEG dual capture
- Ultra HDR with Camera Extensions: Combine Night Mode or other extensions with Ultra HDR output (OUTPUT_FORMAT_JPEG_ULTRA_HDR) on supported devices. Availability varies by OEM, device model, and camera lens.
- Zero-Shutter Lag for instant captures (experimental since CameraX 1.2, production-ready in 1.5)
- Dynamic video audio muting, low-light boost (enableLowLightBoostAsync), adjustable torch strength, and NV21 format support
2.2 CameraX 1.6: From Experimental to Stable
CameraX 1.6 is the maturity release: SessionConfig and related 1.5-era experimental APIs are now stable, while the 1.6 line also adds new infrastructure and configuration improvements like CameraPipe migration, ExtensionSessionConfig, and a suspending ExtensionsManager API.
If 1.5 was “here are powerful new tools,” 1.6 is “those tools are now production-grade” (the 1.6 line is at RC as of this writing, with stable imminent).
2.2.1 SessionConfig Graduates
The @ExperimentalSessionConfig opt-in annotation is gone. Code that used it can simply remove the annotation. No API changes needed. The query method has been renamed from isFeatureGroupSupported() to isSessionConfigSupported() for clarity.
This is the strongest signal that SessionConfig is the recommended way forward for managing camera configurations. The old unbindAll() / bindToLifecycle() pattern still works, but SessionConfig is now the preferred approach.
2.2.2 CameraPipe Under the Hood
CameraX now runs on CameraPipe, the same unified camera stack used by the Pixel camera app. CameraPipe is Google’s internal camera framework that provides a consistent, well-tested abstraction over Camera2 and Camera HAL, battle-hardened across millions of Pixel photos.
This is an internal plumbing change; that is, your code doesn’t change. But you benefit from the shared improvements: better resource management, more consistent behavior across devices, and fixes that flow from the Pixel camera team directly into CameraX.
2.2.3 ExtensionSessionConfig
Extensions can now be configured through SessionConfig instead of swapping CameraSelectors. The old approach required obtaining a modified CameraSelector from ExtensionsManager and using it during binding. The new approach bundles the extension mode directly into a SessionConfig:
// 1.5 approach: swap the CameraSelector
val selector = extensionsManager.getExtensionEnabledCameraSelector(
    baseSelector, ExtensionMode.NIGHT
)
cameraProvider.bindToLifecycle(owner, selector, preview, imageCapture)

// 1.6 approach: bundle into SessionConfig
val sessionConfig = ExtensionSessionConfig(
    mode = ExtensionMode.NIGHT,
    extensionsManager = extensionsManager,
    useCases = listOf(preview, imageCapture)
)
cameraProvider.bindToLifecycle(owner, baseSelector, sessionConfig)
The ExtensionSessionConfig extends SessionConfig, so it works with the same bindToLifecycle() call. The base CameraSelector stays unchanged — you’re configuring what processing to apply, not which camera to use. This separation of concerns makes the code clearer and fits naturally with the SessionConfig model.
Companion project → both simplistic/ExtensionsPreview.kt and legacy/LegacyExtensionsPreview.kt use the new approach
2.2.4 Suspending ExtensionsManager
ExtensionsManager.getInstance() is now a native Kotlin suspend function. No more getInstanceAsync().get() blocking or addListener callbacks in coroutine contexts:
// Before (1.5): blocking Future.get() inside a coroutine — not ideal
val extensionsManager = ExtensionsManager.getInstanceAsync(context, provider).get()

// After (1.6): proper suspend function
val extensionsManager = ExtensionsManager.getInstance(context, provider)
The old getInstanceAsync() still exists for Java callers and callback-based patterns (like in DisposableEffect).
2.2.5 Expanded Feature Groups
CameraX 1.6 adds new video-specific groupable features through the androidx.camera.video.GroupableFeatures object:
- VIDEO_STABILIZATION — Electronic video stabilization
- UHD_RECORDING — 4K video recording capability
- FHD_RECORDING — 1080p video recording
- HD_RECORDING — 720p video recording
- SD_RECORDING — Standard definition video recording
These join the existing core features (HDR_HLG10, FPS_60, PREVIEW_STABILIZATION, IMAGE_ULTRA_HDR). CameraEffect and ImageAnalysis now work with feature groups — a limitation that existed in 1.5 has been lifted.
Companion project → simplistic/SessionConfigPreview.kt and legacy/LegacySessionConfigPreview.kt now probe the expanded feature set
2.2.6 Looking Ahead
Two experimental APIs are still worth watching as part of CameraX’s forward direction:
- LifecycleCameraProvider — A multi-instance camera provider (introduced in the 1.5 beta line) that allows binding cameras to different lifecycle owners independently. Still experimental, but signals a path toward concurrent camera sessions.
- CameraPresenceListener — Dynamic camera detection for USB cameras and other hot-pluggable devices. Register a listener to be notified when cameras are connected or disconnected at runtime.
Part 3: The Broader CameraX Ecosystem
The features in this section are not new to CameraX 1.5 — they have been available across multiple CameraX releases. What camera-compose adds is a smoother integration experience within Compose, but the underlying APIs are the same.
3.1 CameraX + Media3: Capture → Edit → Playback
CameraX handles capture. Media3 handles everything after: editing, effects, and playback. Together, they form a complete video pipeline — and both now work natively in Compose.
The handoff is simple. CameraX’s VideoCapture use case writes video files. Media3’s Transformer picks them up for editing — trimming, concatenation, applying effects (including custom GlEffect shaders via LiteRT/GPU). Media3’s ExoPlayer + Compose-native PlayerSurface (from media3-ui-compose) handles the final presentation.
The companion project demonstrates this pipeline end-to-end across all three tiers (Legacy, Simplistic, Realistic). Each screen implements a 3-state machine — Camera → Processing → Playback — that captures video, transforms it with Transformer (resized to 720p), and plays the result via ExoPlayer:
// 1. Record with CameraX → cache file
val file = File(context.cacheDir, "raw_${System.currentTimeMillis()}.mp4")
recording = videoCapture.output
    .prepareRecording(context, FileOutputOptions.Builder(file).build())
    .start(mainExecutor) { event -> /* hand off to Transformer on finalize */ }

// 2. Process with Media3 Transformer - e.g. resize to 720p
val editedItem = EditedMediaItem.Builder(MediaItem.fromUri(file.toURI().toString()))
    .setEffects(Effects(listOf(), listOf(Presentation.createForHeight(720))))
    .build()

Transformer.Builder(context).addListener(/* ... */).build()
    .start(editedItem, processedFile.absolutePath)
// 3. Play with ExoPlayer + Compose-native PlayerSurface
PlayerSurface(player = exo, surfaceType = SURFACE_TYPE_TEXTURE_VIEW, modifier = Modifier.fillMaxSize())
Companion project → simplistic/Media3Preview.kt, line 71
The key insight: CameraX and Media3 share the same underlying media infrastructure. Video recorded by CameraX’s Recorder is already in a format that Media3’s Transformer and ExoPlayer consume natively — no intermediate transcoding step needed. And if you need system media controls, picture-in-picture, or background playback, Media3 supports those too — by explicitly creating a MediaSession (and a MediaSessionService for long-lived or background scenarios). Those are optional integration steps beyond the sample above, not automatic behavior.
3.2 CameraX + ML Kit: Real-Time Analysis
CameraX’s ImageAnalysis use case feeds camera frames to ML Kit for real-time processing (barcode scanning, face detection, text recognition, pose estimation). This works identically whether you use PreviewView or CameraXViewfinder, the analysis pipeline is UI-agnostic.
What does change in the Compose integration is how you draw the results. With CameraXViewfinder, your overlay composables live in the same scene graph as the preview, and the same coordinate-mapping principles apply. The companion project’s overlay example uses COORDINATE_SYSTEM_ORIGINAL with a custom CoordinateTransform that maps image-space detections onto a Canvas overlay.
Alternatively, consider using COORDINATE_SYSTEM_SENSOR instead. While you still need to apply ImageInfo.getSensorToBufferTransformMatrix() and UI scaling to draw on your Canvas, working in sensor space unifies your coordinate pipeline and avoids orientation-swap headaches.
Alternatively, if you already have a MutableCoordinateTransformer wired up from tap-to-focus, you could use COORDINATE_SYSTEM_SENSOR and let the transformer handle the sensor-to-UI mapping (same pipeline, no custom transform needed).
3.2.1 The Manual Approach vs. camera-mlkit-vision
Without the bridge library, connecting ML Kit to ImageAnalysis requires manual plumbing. You implement ImageAnalysis.Analyzer, convert each ImageProxy to an InputImage, manage the detector lifecycle, close the proxy after processing, and handle the coordinate system yourself:
// Manual approach — boilerplate-heavy, must close ImageProxy or pipeline stalls
imageAnalysis.setAnalyzer(executor) { imageProxy ->
    val inputImage = InputImage.fromMediaImage(imageProxy.image!!, imageProxy.imageInfo.rotationDegrees)
    barcodeScanner.process(inputImage)
        .addOnCompleteListener { imageProxy.close() }
}
Conceptual example — the companion project uses MlKitAnalyzer instead (see below)
3.3 camera-mlkit-vision: The Bridge Library
MlKitAnalyzer (androidx.camera:camera-mlkit-vision) handles ImageProxy conversion, lifecycle, and coordinates automatically. Create a typed detector, pass it to MlKitAnalyzer, and extract results via result.getValue(det) — returns List<Face>, Pose, List<Barcode>, etc. without casting:
// 1. Typed detector
val faceDetector = FaceDetection.getClient(
    FaceDetectorOptions.Builder()
        .setPerformanceMode(FaceDetectorOptions.PERFORMANCE_MODE_FAST)
        .setLandmarkMode(FaceDetectorOptions.LANDMARK_MODE_ALL).build()
)

// 2. MlKitAnalyzer bridges ImageAnalysis → ML Kit
val analyzer = MlKitAnalyzer(
    listOf(faceDetector), ImageAnalysis.COORDINATE_SYSTEM_ORIGINAL, analysisExecutor
) { result ->
    val faces: List<Face> = result.getValue(faceDetector) ?: return@MlKitAnalyzer
    faceResults = faces.toFaceResults()
}

// 3. Plug into ImageAnalysis and bind alongside Preview
val imageAnalysis = ImageAnalysis.Builder()
    .setBackpressureStrategy(ImageAnalysis.STRATEGY_KEEP_ONLY_LATEST).build()
imageAnalysis.setAnalyzer(analysisExecutor, analyzer)
cameraProvider.bindToLifecycle(lifecycleOwner, selector, preview, imageAnalysis)
Companion project → simplistic/MlKitPreview.kt, line 107
Swapping detectors is just a matter of replacing the client — the MlKitAnalyzer wiring stays the same. The companion project supports face detection, pose estimation, object detection, and barcode scanning with this exact pattern, switching the active detector based on a FilterChip selection.
What MlKitAnalyzer gives you beyond convenience:
- Automatic ImageProxy management. No manual close() calls — the analyzer handles the proxy lifecycle correctly, preventing pipeline stalls.
- Type-safe result extraction. Keep your detector reference typed (FaceDetection.getClient() returns FaceDetector), and result.getValue(det) returns List<Face>? directly — no unchecked casts.
- Multi-detector support. Pass multiple detectors in a single list — MlKitAnalyzer runs them all on each frame and returns results per-detector via getValue().
- Coordinate system selection. COORDINATE_SYSTEM_ORIGINAL returns coordinates in image space (you transform them yourself for overlay drawing). COORDINATE_SYSTEM_SENSOR returns sensor-space coordinates ready for getSensorToBufferTransformMatrix().
The companion project uses COORDINATE_SYSTEM_ORIGINAL with a custom CoordinateTransform that maps image-space detection coordinates to the Canvas overlay — handling rotation, aspect-fill scaling, centering, and front-camera mirroring. This approach gives full control over the mapping when your overlay draws directly on a Canvas.
Tip: If you already have a MutableCoordinateTransformer wired up from tap-to-focus, consider using COORDINATE_SYSTEM_SENSOR instead — the ML Kit coordinates will flow through the same sensor-to-UI pipeline you’ve already built, with no custom transform needed.
3.3.1 Drawing ML Kit Results: Coordinate Transform + Canvas Overlay
The detection pipeline gives you coordinates in image space (e.g. 640×480). Your Canvas overlay matches the composable’s display size (e.g. 1080×2340). Bridging them is the hardest part of ML Kit overlays — you need to handle rotation, aspect-fill scaling, centering, and front-camera mirroring:
class CoordinateTransform(
    imageWidth: Int, imageHeight: Int, rotationDegrees: Int,
    private val viewSize: Size, private val isFrontCamera: Boolean
) {
    private val scale: Float
    private val offsetX: Float
    private val offsetY: Float

    init {
        // After rotation, image dimensions may swap (90° on most phones)
        val needsSwap = rotationDegrees == 90 || rotationDegrees == 270
        val rotatedW = if (needsSwap) imageHeight.toFloat() else imageWidth.toFloat()
        val rotatedH = if (needsSwap) imageWidth.toFloat() else imageHeight.toFloat()
        scale = maxOf(viewSize.width / rotatedW, viewSize.height / rotatedH)
        offsetX = (viewSize.width - rotatedW * scale) / 2f
        offsetY = (viewSize.height - rotatedH * scale) / 2f
    }

    fun mapPoint(point: PointF): Offset { /* scale + offset + mirror if front camera */ }
    fun mapRect(rect: RectF): Rect { /* map corners via mapPoint */ }
}

// Usage: overlay composable stacked in a Box with CameraXViewfinder
Canvas(modifier = modifier) {
    val transform = CoordinateTransform(imageWidth, imageHeight, rotationDegrees, size, isFrontCamera)
    faces.forEach { face ->
        drawRect(Color.Green, /* transform.mapRect(face.boundingBox) */)
        face.landmarks.forEach { drawCircle(Color.Yellow, center = transform.mapPoint(it)) }
    }
}
Companion project → mlkit/CoordinateTransform.kt, line 23 and mlkit/MlKitOverlay.kt
The same pattern works for pose estimation (draw skeleton connections + joint dots), object detection (bounding boxes + labels), and barcode scanning (boxes + decoded text). The companion project includes all four overlays. The key insight: the overlay composable lives in the same scene graph as CameraXViewfinder — you just stack them in a Box, no special z-ordering required.
3.4 CameraX Extensions: Hardware-Backed Image Processing
CameraX Extensions give your app access to OEM hardware features — Night mode, HDR, Bokeh (portrait), Face Retouch, and Auto — without touching Camera2. These are the same processing modes that power the device’s built-in camera app, exposed through a simple CameraX API.
The key insight: Extensions operate at the CameraX pipeline level, not the UI level. They work identically whether you use CameraXViewfinder or PreviewView. You don’t change your preview code — you configure the extension mode through ExtensionSessionConfig (CameraX 1.6).
3.4.1 How It Works
The flow is three steps: get ExtensionsManager, check what’s available, and bind with an ExtensionSessionConfig that bundles the extension mode into a SessionConfig:
val extensionsManager = ExtensionsManager.getInstance(context, cameraProvider) // suspend (1.6)
val baseSelector = CameraSelector.DEFAULT_BACK_CAMERA

// Check availability, then bind with ExtensionSessionConfig
if (extensionsManager.isExtensionAvailable(baseSelector, ExtensionMode.NIGHT)) {
    val sessionConfig = ExtensionSessionConfig(
        mode = ExtensionMode.NIGHT,
        extensionsManager = extensionsManager,
        useCases = listOf(preview, imageCapture)
    )
    cameraProvider.bindToLifecycle(lifecycleOwner, baseSelector, sessionConfig)
} else {
    cameraProvider.bindToLifecycle(lifecycleOwner, baseSelector, preview, imageCapture)
}
Companion project → simplistic/ExtensionsPreview.kt, line 90
That’s it. The base CameraSelector stays unchanged — ExtensionSessionConfig tells CameraX what processing to apply, not which camera to use. Captured photos include the extension’s enhancements automatically.
Preview vs. Capture: Extensions primarily affect captured images, not necessarily the live preview. Night mode uses multi-frame computational photography that runs at capture time. Bokeh applies depth processing that may or may not be visible in preview depending on the OEM.
The preview may look identical across modes — to see the real difference, take a photo with and without the extension enabled and compare in Gallery. The companion project includes a capture button for exactly this purpose.
3.4.2 Device-Dependent Availability
Not every device supports every extension. A mid-range phone might offer Night and HDR but not Bokeh. Emulators typically support NONE only. Additionally, CameraX 1.6 Extensions require Android 13 (API 33) or higher.
On lower API levels, extensionsManager.isExtensionAvailable() simply returns false for all hardware modes regardless of physical device capabilities. This is why the availability check matters. Your UI should discover what’s available and disable what isn’t:
// Check all modes once on launch — use the map to enable/disable UI chips
val availability = ExtensionModeOption.entries.associate { option ->
    option.mode to extensionsManager.isExtensionAvailable(baseSelector, option.mode)
}
Companion project → simplistic/ExtensionsPreview.kt, line 119
In practice, you usually do not need a separate API < 33 branch. If you always gate your UI and binding logic behind isExtensionAvailable(…), devices below Android 13 will naturally fall back to plain Preview + ImageCapture with all hardware extension modes disabled (no crash, no special-casing).
The companion project does exactly this: the availability map disables all extension chips, and the rebind path falls back to normal non-extension binding when the selected mode is unavailable. The one UX improvement worth considering is showing users why every mode is unavailable (e.g. “Extensions require Android 13+”) rather than just disabling the chips silently.
3.4.3 Rebinding on Mode Change
When the user switches extension modes, you unbind and rebind with a new ExtensionSessionConfig. In the Compose-native approach, this is a LaunchedEffect keyed on the selected mode:
// Rebind when user switches mode — build a new ExtensionSessionConfig
LaunchedEffect(selectedLens, selectedMode) {
    val extensionsManager = ExtensionsManager.getInstance(context, cameraProvider)

    cameraProvider.unbindAll()

    if (selectedMode.mode != ExtensionMode.NONE &&
        extensionsManager.isExtensionAvailable(baseSelector, selectedMode.mode)
    ) {
        val sessionConfig = ExtensionSessionConfig(
            mode = selectedMode.mode,
            extensionsManager = extensionsManager,
            useCases = listOf(preview, imageCapture)
        )
        cameraProvider.bindToLifecycle(lifecycleOwner, baseSelector, sessionConfig)
    } else {
        cameraProvider.bindToLifecycle(lifecycleOwner, baseSelector, preview, imageCapture)
    }
}
Companion project → simplistic/ExtensionsPreview.kt, line 138
Binding ImageCapture alongside Preview is important — without it, there’s no way to actually see the extension’s effect since it primarily applies at capture time. The capture button lets users take photos with different modes and compare the results in Gallery.
In the legacy PreviewView approach, the same logic lives in a DisposableEffect with nested addListener callbacks — using getInstanceAsync instead of the suspending getInstance, but the ExtensionSessionConfig binding is identical. The companion project includes both versions side by side.
3.4.4 Extensions vs. Camera2Interop
Extensions and Camera2Interop serve different purposes. Camera2Interop gives you raw sensor control (manual ISO, shutter speed) — you’re telling the camera exactly what to do. Extensions give you OEM-optimized processing — you’re telling the camera what result you want (better night photos, background blur) and letting the hardware figure out how. You can’t use both simultaneously on the same camera session, but you can offer them as separate modes in your app.
3.4.5 OEM Limitations and Per-Lens Availability
Testing CameraX Extensions across different devices reveals an important reality: extension availability is entirely OEM-dependent and varies per physical camera lens.
Samsung, for example, uses a proprietary ISP (Image Signal Processor) pipeline for their native camera app. The Extensions API is a standardized interface that OEMs choose to implement — Samsung exposes only a subset of modes through it. This means a Galaxy S24 Ultra may report HDR and Auto as unavailable through ExtensionsManager, even though the hardware clearly supports these features in the stock Samsung Camera app. The same applies to other OEMs — each decides independently which modes to surface through the CameraX Extensions API.
Additionally, extension availability varies per physical camera lens. A mode available on the wide lens may be unavailable on the ultrawide or telephoto. To explore this, the companion project’s Extensions demo includes a lens selector that lets you switch between physical cameras and see how the available modes change. The lens enumeration uses the same Camera2CameraInfo technique described in the Physical Lens Selection section below.
This is not a bug — it’s an architectural reality of how the Extensions API works as an abstraction over vendor-specific processing pipelines.
3.5 Physical Lens Selection
Modern phones have multiple physical cameras behind what CameraX calls “back camera.” A Galaxy S24 Ultra has four: ultrawide (1mm), wide (6.3mm), telephoto (3x), and super telephoto (5x). When you use CameraSelector.DEFAULT_BACK_CAMERA, CameraX selects the logical camera — a fused view that the OS switches between automatically based on zoom level. To access individual lenses directly, you need Camera2CameraInfo.
The approach uses availableCameraInfos from ProcessCameraProvider to discover all cameras that CameraX can bind to independently, then reads focal length and facing from Camera2 characteristics. An important caveat: availableCameraInfos only returns independently bindable cameras. On many Samsung devices (e.g. Galaxy S24 Ultra), the telephoto lenses are physical sub-cameras within a logical multi-camera and aren’t listed separately — they’re accessed via zoom ratio on the logical camera instead. You’ll typically see the logical back camera (wide) plus the standalone ultrawide, but not the individual telephoto cameras.
Not everything in availableCameraInfos is a real camera either. Samsung exposes an IR sensor (used for face unlock) as a front-facing camera entry. Without filtering, your app would show two “front cameras” — one real and one that produces only infrared frames. The fix is to check REQUEST_AVAILABLE_CAPABILITIES for BACKWARD_COMPATIBLE, which is the Camera2 capability that guarantees a camera supports standard preview and capture. IR sensors, depth cameras, and other special-purpose hardware lack this capability:
@ExperimentalCamera2Interop
fun enumerateCameraLenses(cameraProvider: ProcessCameraProvider): List<CameraLensInfo> {
    return cameraProvider.availableCameraInfos.mapNotNull { cameraInfo ->
        val camera2Info = Camera2CameraInfo.from(cameraInfo)

        // Filter out IR sensors, depth cameras — only BACKWARD_COMPATIBLE supports preview + capture
        val capabilities = camera2Info.getCameraCharacteristic(REQUEST_AVAILABLE_CAPABILITIES)
        if (capabilities?.contains(BACKWARD_COMPATIBLE) != true) return@mapNotNull null

        val facing = camera2Info.getCameraCharacteristic(LENS_FACING) ?: return@mapNotNull null
        val focalLength = camera2Info.getCameraCharacteristic(LENS_INFO_AVAILABLE_FOCAL_LENGTHS)
            ?.firstOrNull() ?: return@mapNotNull null

        CameraLensInfo(camera2Info.cameraId, classifyLens(focalLength), focalLength, facing)
    }.sortedBy { it.focalLength }
}

// Bind a specific camera by ID
fun buildCameraSelectorForId(cameraId: String) = CameraSelector.Builder()
    .addCameraFilter { cameras -> cameras.filter { Camera2CameraInfo.from(it).cameraId == cameraId } }
    .build()
Companion project → CameraLensUtils.kt, line 46
Note on focal lengths: The values reported by LENS_INFO_AVAILABLE_FOCAL_LENGTHS are physical focal lengths in millimeters — not 35mm equivalent. A “1.0mm” lens on a phone is an ultrawide, not a fisheye. The classification in the companion project uses: ultrawide (< 3mm), wide (3–7mm), telephoto (7–12mm), super telephoto (>= 12mm). The wide band extends to 7mm to accommodate large-sensor flagships (e.g. Galaxy S24 Ultra main at ~6.3mm, Pixel 9 Pro at ~6.9mm) whose primary cameras report higher physical focal lengths despite being “wide” in 35mm-equivalent terms.
Caveat: This heuristic classifies by physical focal length alone, which is sensor-size-dependent. The same focal length produces different fields of view on different sensor sizes — a 6.5mm lens on a large 1/1.3″ sensor is wide-angle, but 6.5mm on a tiny 1/3.94″ sensor would be telephoto. In practice the risk is low: availableCameraInfos typically returns only 2–3 cameras (ultrawide, logical wide, front) with large gaps between their focal lengths, and telephoto sub-cameras aren’t independently enumerable on most flagships. For a more robust approach, you could compute the 35mm-equivalent focal length using SENSOR_INFO_PHYSICAL_SIZE — focalLength / sensorDiagonal * 43.27f — and classify on that (ultrawide < 24mm, wide 24–50mm, telephoto 50–100mm, super telephoto >= 100mm). The companion project keeps the simpler heuristic for readability.
This requires @ExperimentalCamera2Interop because Camera2CameraInfo bridges CameraX and Camera2. The companion project includes both Simplistic (CameraXViewfinder) and Legacy (PreviewView) implementations side by side.
3.6 The Bigger Integration Picture
Google’s open-source Androidify app demonstrates how these pieces come together in a real Compose application: CameraX for capture, Media3 for video handling, ML Kit for face/body detection, Firebase AI Logic SDK for generative features — all composed with Material 3 Expressive and Navigation 3. It’s a practical reference for building AI-driven camera experiences with the modern Jetpack stack.
The pattern is consistent across all these integrations: CameraX produces, Compose consumes, and the rest of Jetpack plugs in naturally. Whether that’s Media3 for the video pipeline, ML Kit for real-time analysis, Extensions for hardware-backed processing, or LiteRT for on-device inference — the unidirectional data flow and composable architecture make each integration feel like a natural extension rather than a separate subsystem.
Testing Checklist
- Verify tap-to-focus accuracy in portrait/landscape and with ContentScale.Crop/Fit.
- Exercise zoom limits; ensure smooth pinch and programmatic zoom transitions.
- Switch cameras (front/back) and re-verify transforms + mirror behavior.
- Navigate away/back, rotate, and process configuration changes; preview should recover without flicker.
- Record video while focusing/zooming; ensure no dropped surfaces.
- Test ContentScale and Alignment combinations to ensure no unexpected cropping of key subjects.
- If using ML Kit overlays, verify bounding box alignment across orientations and aspect ratios.
- Test the full capture → edit → playback pipeline if using Media3 integration.
- If using Extensions, verify availability checks on target devices; test mode switching rebinds without crashes.
- If using physical lens selection, verify lens chips appear with descriptive labels on multi-camera devices; switching lenses changes the preview.
- On the Extensions screen, verify that switching lenses refreshes extension availability — some modes may become available or unavailable depending on the camera.
- On single-camera devices, verify that only 2 lens chips appear (Back + Front) and no crash occurs.
What You Should Do Now
If you’re starting a new camera feature in Compose: Use CameraXViewfinder from day one. It’s the natural choice for a Compose codebase — all the camera capabilities of PreviewView, with a native composable architecture (no View lifecycle to manage), resilient surface lifecycle, and native ContentScale/Alignment. If you need video editing or playback, add Media3. If you need real-time analysis, add ML Kit via ImageAnalysis. If you want OEM hardware modes (Night, HDR, Bokeh), add camera-extensions — in the 1.6 line, the modern path is ExtensionSessionConfig, with the older CameraSelector-based approach still available for compatibility.
If you have existing camera code with PreviewView: No rush. Your code works, and PreviewView remains fully supported. When you’re ready — maybe for a new screen, or during an architecture update — add camera-compose to your dependencies and migrate incrementally. Start with your simplest camera UI (preview only). Get comfortable with the new state flow. Then migrate interactions like focus and zoom.
If you’re building a library: Now is the time to add Compose-native camera components to your SDK. Developers want composable camera solutions, and the ecosystem is ready.
When You Still Need Camera2
Even with CameraX 1.6 and Compose integration, CameraX is a “90% solution.” For the remaining 10%, Camera2Interop is your escape hatch — it lets you set any Camera2 capture request parameter without leaving CameraX. You keep lifecycle management, vendor quirk handling, and use case coordination. You’re just injecting specific Camera2 settings into the pipeline.
This applies equally to XML and Compose. If CameraX can’t do something, switching from Compose to XML won’t help — you’d use Camera2Interop either way.
1. Per-Frame Sensor Control
CameraX supports manual ISO and shutter speed via Camera2Interop:
// Inject Camera2 parameters directly into the CameraX Preview use case
val camera2Interop = Camera2Interop.Extender(previewBuilder)
camera2Interop.setCaptureRequestOption(CaptureRequest.CONTROL_AE_MODE, CaptureRequest.CONTROL_AE_MODE_OFF)
camera2Interop.setCaptureRequestOption(CaptureRequest.SENSOR_SENSITIVITY, 400) // ISO
camera2Interop.setCaptureRequestOption(CaptureRequest.SENSOR_EXPOSURE_TIME, 1_000_000_000L / 60) // 1/60s
Companion project → simplistic/ManualExposurePreview.kt, line 108
This works on most devices, though behavior can vary across OEMs. For “pro camera” apps requiring identical manual controls across every device, you may need more extensive testing — but you can still stay within CameraX.
2. Custom Memory Management for Computational Photography
Direct control over ImageWriter/ImageReader memory pools for complex multi-frame HDR stacking, computational RAW processing, or custom capture sequences may require bypassing CameraX and using Camera2’s lower-level surface management directly.
3. Multi-Camera Switching and Synchronous Zoom
CameraX has limitations regarding switching between physical lenses during active video recording. Apps requiring “smooth zoom” transitions across multiple physical sensors or simultaneous use of three or more cameras often require Camera2’s granular CaptureSession control.
4. High-Performance NDK Processing
For ultra-low-latency frame processing (high-end AR, real-time C++ filters), the Camera2 NDK (C++) API skips the Java layer entirely — highest performance at highest complexity.
5. Features Not Yet in CameraX
Occasionally, a Camera2 capability exists that CameraX hasn’t abstracted yet. Often, Camera2Interop can access it. In rare cases, you’d need Camera2 directly until CameraX adds support.
Bottom line: Start with CameraX. If you need a Camera2 feature, try Camera2Interop first. Only go full Camera2 if you truly need capabilities that Camera2Interop can’t provide.
The “If It Ain’t Broke” Factor
If you have a battle-tested PreviewView implementation validated across thousands of device models (banking scanners, medical imaging, enterprise apps), don’t rewrite it just for Compose. Migrate when you have a concrete reason — new features, new screens, architecture modernization — not just because there’s a new API.
But if you’re starting fresh or already building in Compose, there’s no reason to use XML for camera features. CameraXViewfinder gives you everything PreviewView does — plus capabilities it couldn’t offer.
CameraX at a Glance
Each generation of the Android camera stack solved a specific set of limitations — and laid the groundwork for the next. This table summarizes the key innovations, the problems they addressed, and the interaction model each introduced.
https://medium.com/media/ef0498eb43bdc562aa745c931d2427da/href
Further Reading
- CameraX Release Notes — Official changelog and artifacts
- CameraX 1.6.0-rc01 Release Notes — SessionConfig stable, ExtensionSessionConfig, CameraPipe migration
- CameraXViewFinder — Summary
- CameraXViewfinder — Implementation Modes — EMBEDDED and EXTERNAL modes
- CameraX Samples on GitHub — Real code examples
- Jetpack Camera App — Google’s reference implementation
- Introducing CameraX 1.5: Powerful Video Recording and Pro-level Image Capture — Official CameraX 1.5 announcement
- Seamless video capture, editing, and playback with CameraX and Media3 — Google I/O ’25 session on CameraX + Media3 + LiteRT integration
- Building Delightful Android Camera and Media Experiences — Broader media ecosystem overview
- Androidify: Building AI-driven experiences with Compose, Gemini, and CameraX — Real-world reference app
The King is Dead / Long Live the King
CameraX for Compose is the natural next chapter, and a genuine evolution.
PreviewView served us well, and it’s still a perfectly valid choice. But CameraXViewfinder isn’t just PreviewView in Compose clothing. It eliminates the View-inside-Compose lifecycle mismatch, replaces the legacy ScaleType with native ContentScale and Alignment, and removes the split mental model that came with embedding an imperative View in a declarative world. And with Media3, ML Kit, and Extensions plugging in naturally alongside it, the camera is no longer an isolated component — it’s part of a complete capture-to-consumption pipeline, all in Compose.
If you’re building new camera features in 2026 and beyond, you can now build them like the rest of your app: in Compose, with Compose tools, one consistent mental model, and a camera preview that actually behaves like a composable.
Welcome to the Compose era of camera development.
Compose-Native CameraX in 2026: The Complete Guide was originally published in ProAndroidDev on Medium, where people are continuing the conversation by highlighting and responding to this story.


This Post Has 0 Comments