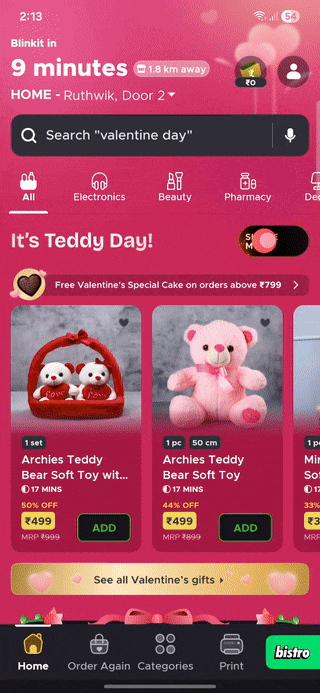

Readers from India might know that Blinkit has introduced a Single Mode toggle for Valentine’s week on their landing screen. From a product perspective, it’s cool, but what really stood out to me was the smooth transition. For other readers, see the image below. What stood out was not just the animation itself, but how effortlessly the UI transformed, the search bar stayed in place, the scroll position remained untouched, and the entire experience felt fluid.
Let’s try to recreate a basic version of this transition using Jetpack Compose.
So how did they pull this off? 🤔
Like everyone else, my first thought was the obvious solution: take a screenshot of the current view, load the other view in the background, and then do a reveal on the image. But then I felt that is too simple, would they really do it that way? There should be a better, and sometimes even the best solution.
So I inspected the layout and realised that these are actual views/composables being transformed. It made me think again. Some time back, I had seen a cool light-to-dark mode transition in another article where the theme was revealed in a circular way. The key APIs used were Modifier.drawWithContent {} and Modifier.clipPath().
Using a similar approach felt like the better solution here.
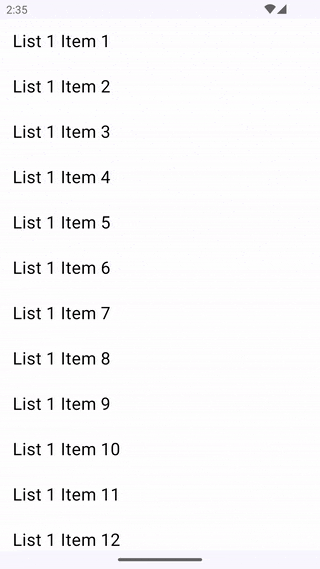
Let me explain it in detail. The result of what we build will look like the image below.

So whats this modifier do ?
drawWithContent() is a Modifier that lets you draw custom graphics alongside the composable’s own content.
See the example
Box(
    modifier = Modifier
        .size(100.dp)
        .drawWithContent {
            // Draw a red background BEHIND the content
            drawRect(Color.Red)

            // Draw the actual composable content
            drawContent()

            // Draw a semi-transparent overlay ON TOP
            drawRect(Color.Black.copy(alpha = 0.3f))
        }
)
Modifier.clipPath() is similar to Modifier.clip() but if you want to clip using a custom Path, you can do it with drawWithContent()
Lets see an example
Modifier.drawWithContent {
    val path = Path().apply {
        // define your custom path here
        addOval(Rect(0f, 0f, size.width, size.height))
    }
    clipPath(path) {
        this@drawWithContent.drawContent()
    }
}
What’s happening:
- You create a Path (any shape you want. Star, triangle, wave, etc.)
- clipPath(path) tells Compose: “only show whatever is drawn inside this path’s boundary”
- drawContent() inside the clip block means the composable’s actual content gets clipped to that path
Now let’s combine this knowledge. Let’s create a simple LazyColumn and try to reveal it using an animation. The logic is simple: I’ll create a path/rectangle from the top, then increment its value/size until it reaches the screen height, and tell Compose to draw only inside that path using clip().
@Composable
fun Reveal() {

    val progress = remember { Animatable(0f) }

    LaunchedEffect(Unit) {
        delay(3000)
        progress.snapTo(0f)
        progress.animateTo(1f, tween(3000))
    }

    Box(
        Modifier.fillMaxSize()
    ) {
        LazyColumn(
            state = rememberLazyListState(),
            modifier = Modifier
                .fillMaxWidth()
                .lineReveal(progress.value)
                .background(Color.White)
        ) {
            items((1..50).toList()) {
                Text(
                    "Item $it",
                    fontSize = 22.sp,
                    color = Color.Black,
                    modifier = Modifier.padding(16.dp)
                )
            }
        }
    }
}


fun Modifier.lineReveal(progress: Float) =
    drawWithContent {
        val revealY = size.height * progress

        val path = Path().apply {
            addRect(Rect(0f, 0f, size.width, revealY))
        }

        clipPath(path) {
            this@drawWithContent.drawContent()
        }
    }
In the above code, we create a rectangular path and expand it. The content in the lazy list is clipped inside our path, i.e the rectangle. It looks like this.

Hope drawWithContent() and clipPath() are clear. This is the core idea. Now, to reveal one list over another, we create two lists and toggle between them. If you add another list above the lineReveal() one, you will get the following output.
This can be improved to create something cool like Blinkit’s transition, or you can use it in your dark–light mode switching screen. Hope you learned something new today. Thanks for reading!
Curtain Reveal Transition in Jetpack Compose; Inspired by Blinkit’s Valentine’s Week Experience was originally published in ProAndroidDev on Medium, where people are continuing the conversation by highlighting and responding to this story.


This Post Has 0 Comments