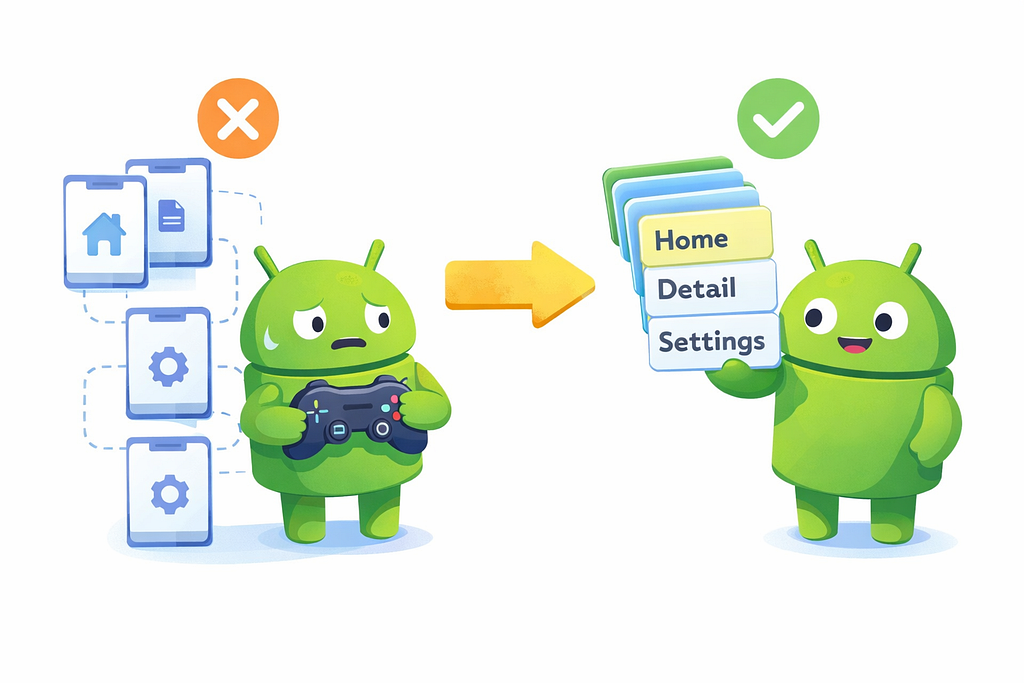

When developers first look at the changes from Navigation2 to Navigation3 in Jetpack Compose, it can seem complicated. New components like NavDisplay, type-safe routes, and explicit back stacks may feel like a completely different system.
Migrate from Navigation 2 to Navigation 3 | App architecture | Android Developers
However, the transition becomes much easier if you start with one simple idea: navigation is now just state.
In Navigation2, navigation was mainly controlled by the framework through NavHost and string routes.
In Navigation3, navigation is represented as state that you manage directly using objects and back stacks.
Once you understand this concept, the rest of Navigation3 starts to make much more sense.
Start with a Simple Idea

When transitioning from Jetpack Compose Navigation2 to Navigation3, the new APIs may initially feel unfamiliar. New components like NavBackStackand NavDisplaycan make the architecture appear more complex than before.
However, the easiest way to understand Navigation3 is to start with a simple idea: navigation is now treated as state.
In Navigation2, navigation was primarily controlled by the framework. Developers interacted with NavHostController, andNavHostcomposable handled which screen should appear.
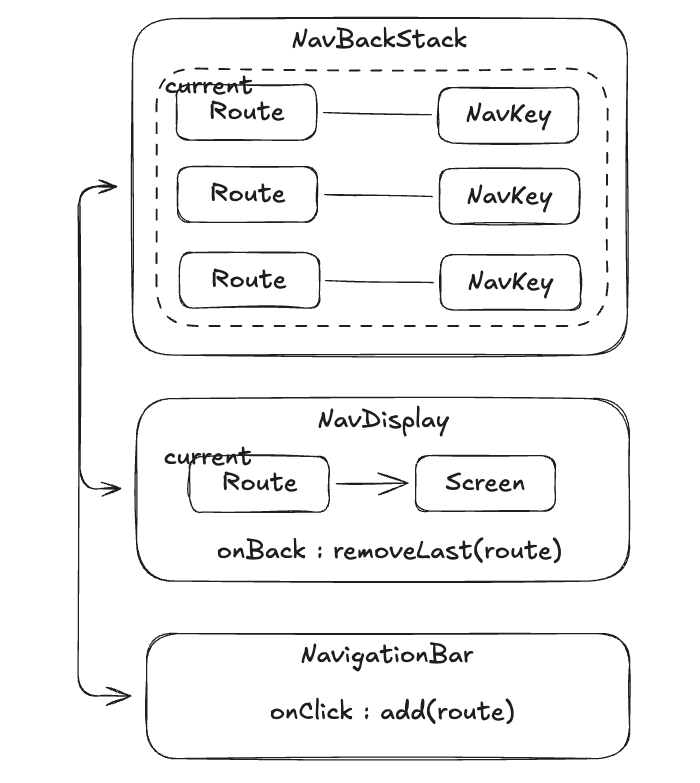
In Navigation3, the responsibility becomes clearer and more explicit. Instead of a controller managing navigation internally, developers manage a NavBackStack, which represents the current navigation state. The UI is then rendered by NavDisplay, which simply displays what the back stack contains.
This separation makes navigation more predictable and easier to reason about, especially when working with state-driven UI in Jetpack Compose.
Let’s try it out
You’ll often see this pattern in modern apps built with Jetpack Compose.
1. Update Dependencies
To update Navigation3 dependencies in your Android project, modify your build.gradle.ktsfile to use the latest versions. For example:
implementation("androidx.navigation3:navigation3-ui:1.0.1")
implementation("androidx.navigation3:navigation3-runtime:1.0.1")
After updating, sync the project to ensure the new library versions are applied, giving access to the latest features and bug fixes.
2. Create Routes Using NavKey
NavKey:
- A key used to identify a screen
- Usually combined with @Serializable for type-safe navigation
- Stored inside NavBackStack, enables type-safe navigation
In Navigation3, you can create routes by defining objects or classes that implement NavKey. Each NavKey represents a distinct screen or destination in your app, optionally carrying parameters for navigation. These routes can then be pushed onto a NavBackStack to navigate between screens while preserving back stack history.
@Serializable
sealed interface TabRoute : NavKey {
  val label: String
  val selectedIcon: ImageVector
  val unselectedIcon: ImageVector

  companion object {
    val entries = listOf(RecentTab, EmojiTab, SettingsTab)
  }
}

@Serializable
data object RecentTab : TabRoute {
  override val label = "Recent"
  override val selectedIcon = Icons.Filled.History
  override val unselectedIcon = Icons.Outlined.History
}

@Serializable
data object EmojiTab : TabRoute {
  override val label = "Emoji"
  override val selectedIcon = Icons.Filled.TagFaces
  override val unselectedIcon = Icons.Outlined.TagFaces
}

@Serializable
data object SettingsTab : TabRoute {
  override val label = "Settings"
  override val selectedIcon = Icons.Filled.Settings
  override val unselectedIcon = Icons.Outlined.Settings
}
3. Building Screen Layouts with Scaffold

In Jetpack Compose, Scaffoldprovides a standard layout structure for screens, including slots for a top bar, bottom bar, floating action button, and main content. It helps keep the UI consistent across the app and manages system insets automatically. By placing your content inside the content slot, you can build screens with a predictable and reusable layout.
@Composable
fun MainScreen() {

  /*** NavBackStack → 4 ***/

  Scaffold(

    bottomBar = {

      /*** NavigationBar → 6 ***/

    },

  ) {

    /*** NavDisplay → 5 ***/

  }

}

@Composable
fun RecentScreen() { }

@Composable
fun EmojiScreen() { }

@Composable
fun SettingsScreen() { }
4. Create a NavBackStack with the initial Route
NavBackStack:
- A stack that stores navigation history
- Screens are added and removed using add() / removeAt()
- One of the core components of Navigation3
- Integrated with Compose state
- NavBackStack is not just a List
- Optimized for navigation state
You can create a NavBackStack by calling rememberNavBackStack with an initial Route, such as RecentTab. This initializes a navigation stack that tracks the history of screens, allowing you to push or pop routes as the user navigates. It provides a reactive state that can be used directly in a NavDisplay or tab-based UI.
val navBackStack = rememberNavBackStack(RecentTab)
5. Create a NavDisplay with the NavBackStack
NavDisplay:
- A Composable that renders the current screen from a NavBackStack
- Gets the current screen
- Renders UI for that screen
- Automatically reacts to stack changes
To create a NavDisplayusing a NavBackStack in Jetpack Compose Navigation3, you can structure it so that each tab or route has its own NavBackStack, and NavDisplay observes the current state to render the correct screen.
NavDisplay(
  backStack = navBackStack,
  onBack = {
    navBackStack.removeAt(navBackStack.lastIndex) // ⭐️
  },
  entryProvider = entryProvider { // ⭐️
    entry<RecentTab> { RecentScreen() }
    entry<EmojiTab> { EmojiScreen() }
    entry<SettingsTab> { SettingsScreen() }
  }
)
6. Navigating with a Bottom NavigationBar
NavigationBar:
- Just a UI component, not part of Navigation3 core
- A UI component used for tab navigation
- Independent from Navigation3 logic
A Bottom NavigationBar allows users to switch quickly between top-level screens, with each tab maintaining its own navigation stack for smooth back navigation. It works best in apps with three to five main destinations, keeping navigation consistent and accessible.
 NavigationBar() {
    TabRoute.entries.forEach { route ->
      val selected = navBackStack.last() == route // ⭐️
      NavigationBarItem(
        selected = selected,
        onClick = {
          navBackStack.add(route) // ⭐️
        },
        icon = {
          Icon(
            imageVector =
              if (selected) route.selectedIcon else route.unselectedIcon,
            contentDescription = route.label
          )
        }
      )
    }
  }
You can log the stack state using the following code:
Timber.d("stack = ${navbackStack.toList()}")

// stack = [RecentTab, SettingsTab]
Result Preview
Here is what the final result looks like.
Final Thoughts
Official documentation and older articles show that things evolve quickly, which can make it difficult to keep up.
However, if you grasp the core concepts, you’ll be able to adapt to future changes more easily.
Before You Go
You may already want to manage navigation stacks per tab using Map<Tab, NavBackStack<Route>. We’ll dive into that next time.
This approach allows for a more flexible, state-driven multi-stack navigation that perfectly aligns with the declarative nature of Navigation 3.
I’ll keep sharing more insights and articles on Jetpack Compose.
Happy composing 🚀
Thanks for reading!
- 👏 Clap to support the article
- ⭐ Follow me for more Android and Jetpack Compose tips
- 🔔 Turn on email notifications so you never miss a post
Start with the Simple Idea: Migrating from Jetpack Compose Navigation2 to Navigation3 For Now was originally published in ProAndroidDev on Medium, where people are continuing the conversation by highlighting and responding to this story.

This Post Has 0 Comments